

AI in UX Studio: From Brief to High-Fidelity
Edition 7 | A Guide to AI-Powered Visual Prototyping

Welcome back to AI in UX Studio! In our last edition, we did the deep work. We took a pile of raw user feedback and used the source-grounded intelligence of NotebookLM to synthesize it into a clear, data-driven design brief. We now have our "what" and our "why."
Today, we tackle the exciting next step: visualizing the solution. This is where we bridge the gap between a text document and a tangible UI concept. How do we take our brief and create a compelling visual that we can test with users and review with stakeholders, without spending days on exploration?
This is where a new class of AI tools comes in: text-to-UI generators. Unlike general image models, these tools are purpose-built for product design. They understand components, layouts, and screen flows. For this edition, we'll focus on a powerful tool in this space, Google Stitch, to demonstrate a professional workflow for accelerating your design process from a blank canvas to a high-fidelity concept.
Part 1: The Anatomy of a Powerful UI Prompt
The quality of your output depends entirely on the quality of your input. A lazy prompt will give you a lazy design. To get professional results from a text-to-UI tool, your prompt needs to be structured like a clear brief for a junior designer.
I recommend using a simple but effective formula:
A [Screen Type] for a [Platform] app, in the context of [Feature & User Goal]. The screen must contain [List of Key Components]. The overall style is [Style Keywords] with a [Color Palette Description].
Let's build a prompt for the "AI Meeting Assistant" feature from our previous work.
Screen Type:
An AI-generated meeting summary screenPlatform:
for a mobile appFeature & User Goal:
for a productivity app called 'FlowState'. The user's goal is to quickly understand the key outcomes of a past meeting.List of Key Components:
The screen must contain a title, a bulleted list of key decisions, a section for assigned action items with user avatars, and a primary 'Share' button.Style & Colors:
The style is clean, minimalist, and modern, using a light theme with a vibrant blue as the primary accent color.
Putting it all together, our final prompt looks like this:
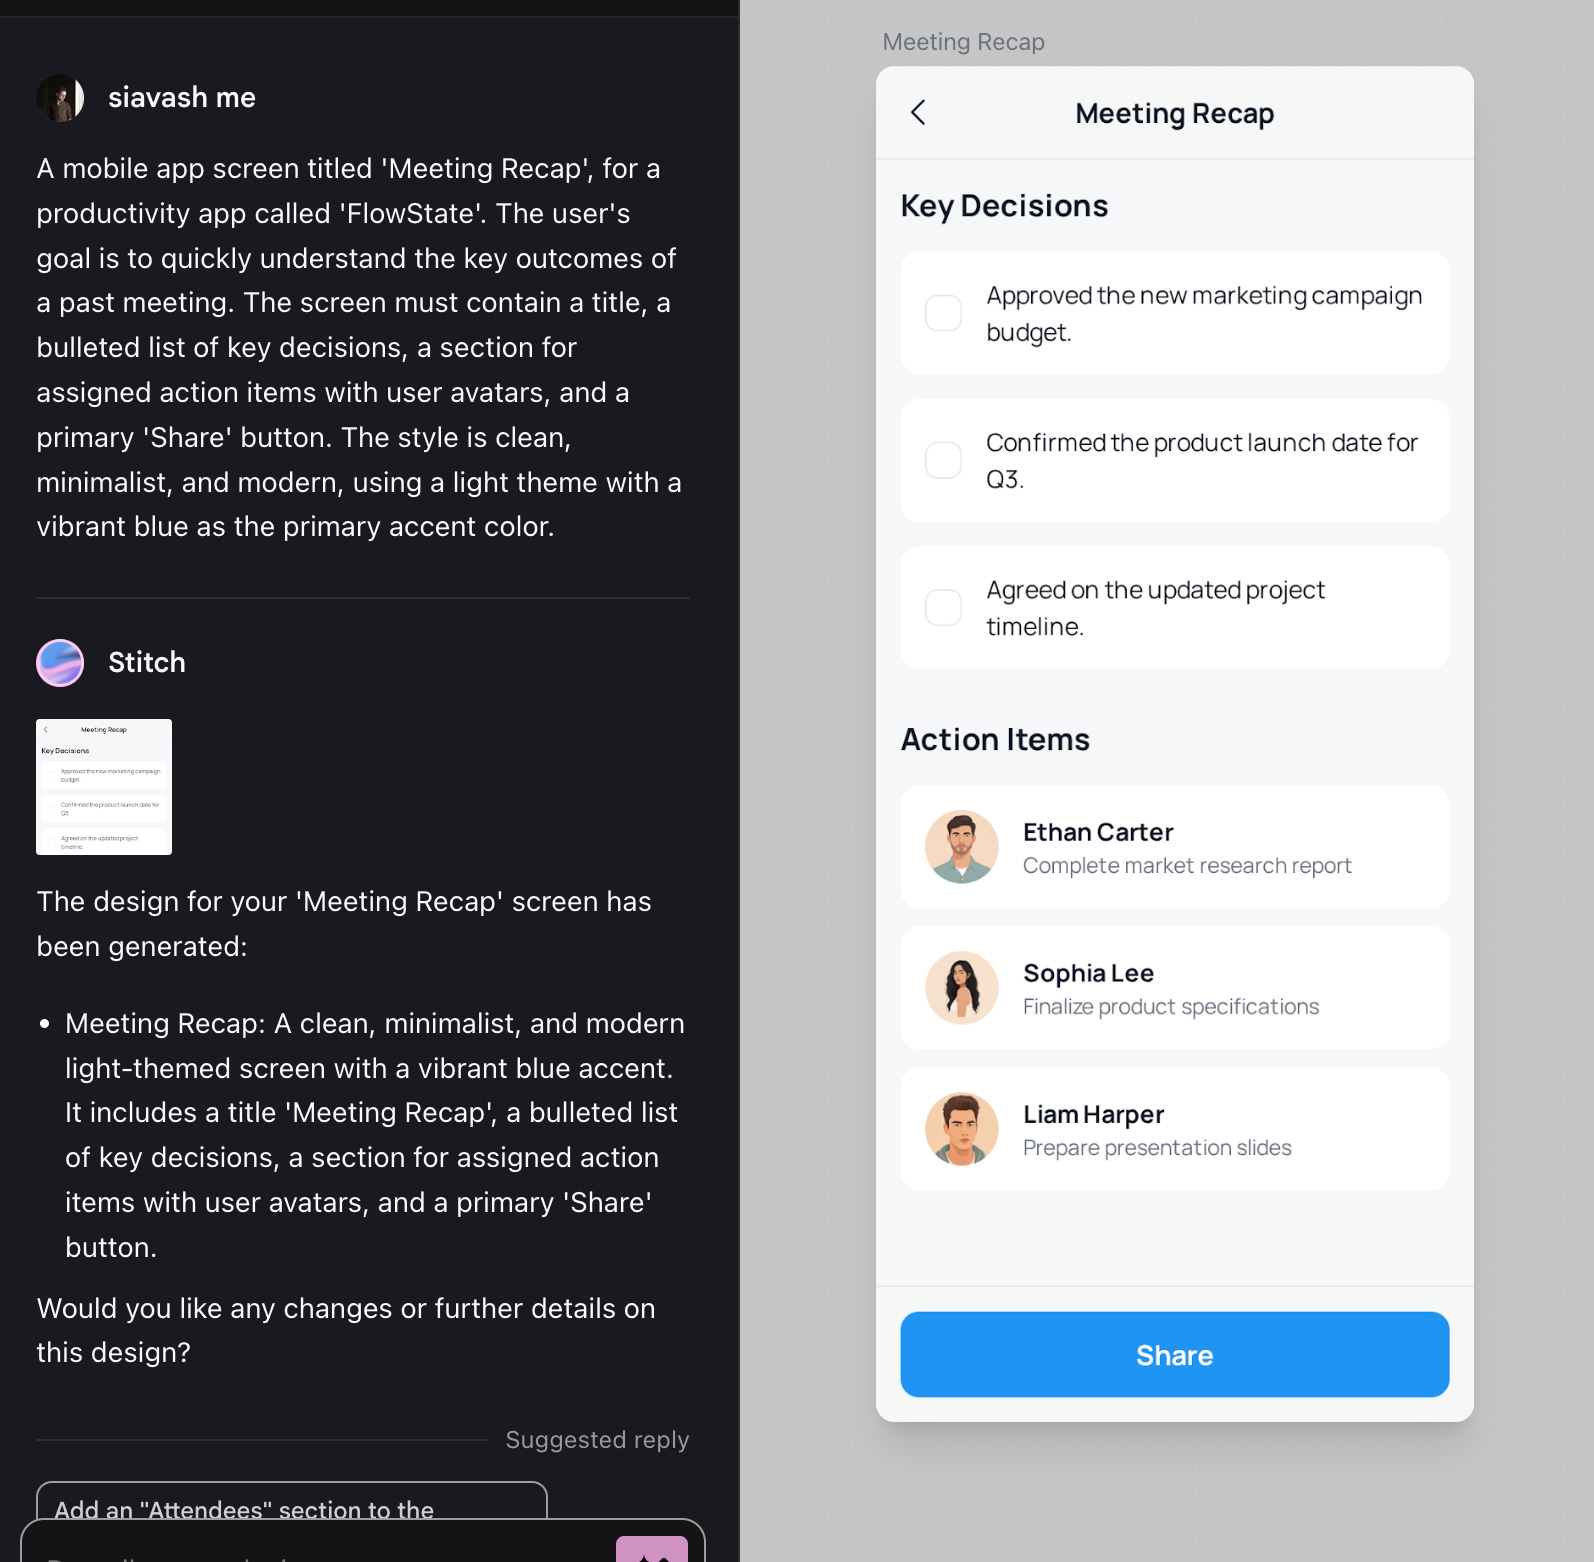
"A mobile app screen titled 'Meeting Recap', for a productivity app called 'FlowState'. The user's goal is to quickly understand the key outcomes of a past meeting. The screen must contain a title, a bulleted list of key decisions, a section for assigned action items with user avatars, and a primary 'Share' button. The style is clean, minimalist, and modern, using a light theme with a vibrant blue as the primary accent color."
This prompt is specific, contextual, and gives the AI all the information it needs to generate a relevant and high-quality design.
Part 2: The Workflow in Action - The Iteration Loop
A professional workflow is never about accepting the first draft. It's about iteration. Let's walk through a realistic cycle of generating a concept with Google Stitch and then refining it with a follow-up prompt.
Generating the First Pass
First, we'll take our detailed prompt to Google Stitch. It's known for generating clean, well-structured mockups that often align with Material Design principles.
After running our prompt, Stitch generates a few variations. Let's analyze one: The layout is clean, the key decisions are nicely formatted, and the 'Share' button is prominent. However, the "assigned action items" section is a bit vague—it's just a list of names and tasks without clear structure. This is a perfect opportunity to refine.
Crafting a Follow-up Prompt
Now, we'll use Stitch's conversational interface to iterate. We'll give it specific instructions to improve the section that was lacking. Try the bellow prompt now.
Keep reading with a 7-day free trial
Subscribe to Eidos Design to keep reading this post and get 7 days of free access to the full post archives.