AI in UX Studio: How to Use NotebookLM for Product Design and UX Research
Edition 7 | A NotebookLM tutorial for Product Designers and Researchers
Hello everyone! I am Siavash and we are back again with a new AI in UX Studio! This month I was only able to prepare this one edition as I'm spending more time building new ways for us to engage as an interactive AI course.
To that end, from this edition on, I'll be creating a dedicated thread for each article in our Substack Chat. It's your all free space to ask questions, share your doubts, or show your own experiences with AI. I'm excited to see you there!
In our previous editions, we've explored how to build AI-driven workflows and measure their impact. Today, we're zeroing in on one of the most time-consuming parts of our job: making sense of research.
As product designers and researchers, we live in a sea of unstructured data—interview transcripts, user feedback, competitor reviews, market reports. Finding the signal in that noise is a monumental task. While general-purpose AIs can help, they often lack focus and can "hallucinate," mixing their training data with your private information.
This edition introduces a specialized tool designed to solve this exact problem: Google's NotebookLM. We'll go deep on how to use it not just as a summarizer, but as a true research assistant that can help you synthesize insights across multiple documents, uncover hidden connections, and accelerate your journey from raw data to a clear, actionable strategy.
What Makes NotebookLM Different? The Power of "Source-Grounded" AI
What makes NotebookLM different from a general-purpose chatbot? The answer is a single, crucial concept: it's a source-grounded AI.
This means that when you ask NotebookLM a question, it will only use the documents you have provided as its knowledge base. It does not search the open internet or draw upon its general training data to answer your questions. Remember in early editions of AI in UX studio we learned How to build custom GPT for your next UX project. This time we have another and more powerful tools for our research and design ideations.
Why this is a game-changer for researchers:
No Hallucinations: The AI is prevented from making things up. Its answers are directly tied to your data.
Built-in Citations: Every answer is linked back to the exact passages in your source documents, allowing for instant verification. This builds trust and is essential for rigorous research.
Data Privacy: Your source material remains private to your account and isn't used to train the general model.
Think of it not as a creative partner, but as an incredibly fast, intelligent, and focused research assistant who has perfectly memorized every word of your project documents and is ready to answer questions about them.
A Practical Walkthrough: The Discovery Phase Tutorial
The Scenario: For this tutorial, let's imagine we are Product Designers working on a new productivity app. Our task is to run a discovery phase for a potential "AI Meeting Assistant" feature. Our goal is to demonstrate how you can use NotebookLM to synthesize insights from multiple sources and create a feature requirements document.
Step 1: Sourcing Your Data
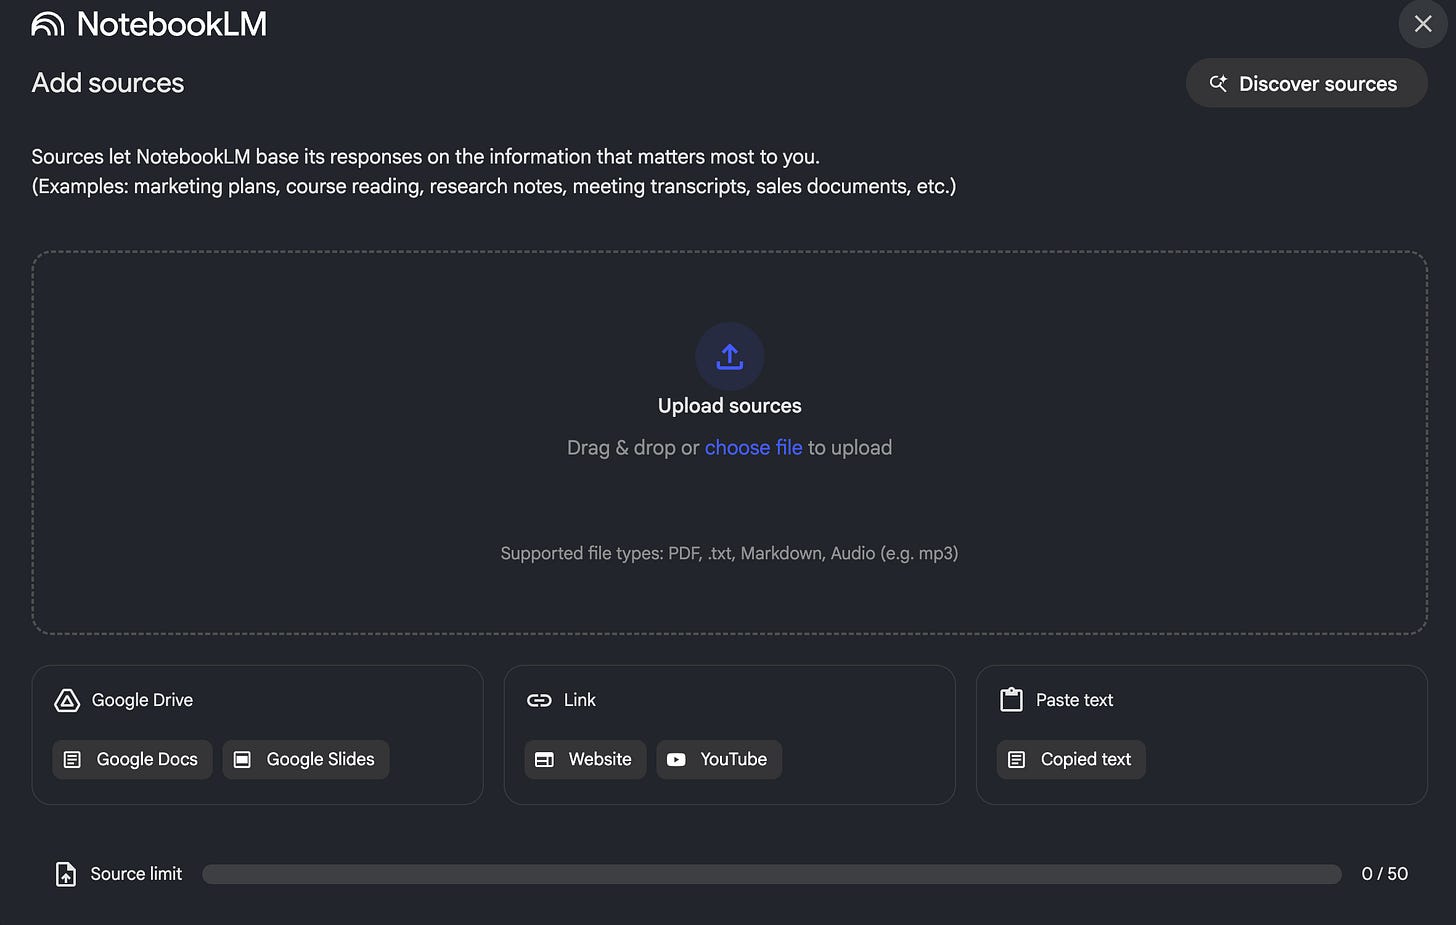
First, you would create a new "notebook" in NotebookLM and give it a name like "AI Meeting Assistant - Research." The power of NotebookLM is its ability to work with varied documents simultaneously. For this walkthrough, we'll use three types of sources you would typically have in a real project:
Example Source 1: A User Interview Transcript (PDF/Google Doc)
In a real project, this would be a long, detailed interview with a potential user (e.g., a project manager), rich with qualitative data, pain points, and direct quotes.
Example Source 2: A Competitor Analysis (Copied Text)
This could be a tech blog's review of a competing product or your own summarized notes. It provides context on existing solutions and market expectations.
Example Source 3: A Market Research Snippet (PDF)
This might be a few pages from a report with statistics on meeting culture and productivity loss, adding quantitative weight to your qualitative findings.
Pro tip: You can upload even your product planning, roadmap, visions, etc. This can help you also to ideate later within the goal of your quarterly planning. Remember you can always uncheck the file that you want to stop sourcing specific prompt.
Remember from Edition 2? Anonymize Everything! before feed any AI.
Never, ever upload sensitive stuff such as User Data or your Company Data without getting permission and making sure it's properly anonymized.
Once you upload your sources, NotebookLM will automatically generate a brief summary for each one, giving you a quick overview.
Step 2: The Deep Dive - Asking Targeted Questions
This is where the real work begins. You can now interact with the AI assistant, using prompts to query the sources you've provided.
Querying a Single Source: Let's imagine we want to dig into our interview transcript.
Example Prompt:
From the "Interview with Project Manager" source, extract all mentioned pain points related to meeting follow-ups. Present them as a bulleted list.Notice how each point in the output will have a small citation number next to it. Clicking it takes you to the exact sentence in your transcript where the AI found that information.
Pro Tip: Remember Edition 6? Start UX Prompting Like a Pro. Don’t forget to use your previous learnings in AI in UX Studio.
Querying Across Multiple Sources: Now, let's demonstrate how to leverage the entire knowledge base.
Example Prompt:
Compare the features of the competitor mentioned in the analysis with the user needs expressed in the interview transcript. Identify any gaps where the user's needs are not being met by the competitor.Step 3: Synthesizing and Structuring Insights
Now you can use NotebookLM to start building your strategic documents from your sources.
Example Prompt:
Based on all provided sources, create a bulleted list of the top 5 user problems that an "AI Meeting Assistant" should solve.Example Prompt:
Generate a table of potential features. The columns should be "Feature," "User Problem it Solves," and "Supporting Evidence from Sources."With each valuable output the AI generates, use the "Pin" feature to save it as a note. You are now actively building your research report within NotebookLM, with every insight automatically linked back to its source.
Step 4: Creating a Final Deliverable
After pinning several key insights, you can use them as context for a final output.
Example Prompt:
Using only the information from my pinned notes, draft a feature requirements document for the "AI Meeting Assistant." Include sections for "User Problems," "Proposed Features," and "Key Success Metrics."The AI will now synthesize your curated insights into a structured, professional document, ready for you to copy, refine, and share with your team.
Pro Tips & Best Practices
Keep reading with a 7-day free trial
Subscribe to Eidos Design to keep reading this post and get 7 days of free access to the full post archives.


